How manage your signals after publishing them
How to manage your signals after they are activated?
In this article we learn you how to manage your signals after they are activated and get reached entry point. It’s very easy on Dealerify to manage your signals even after publish them.
- Change “Target Points” amount:
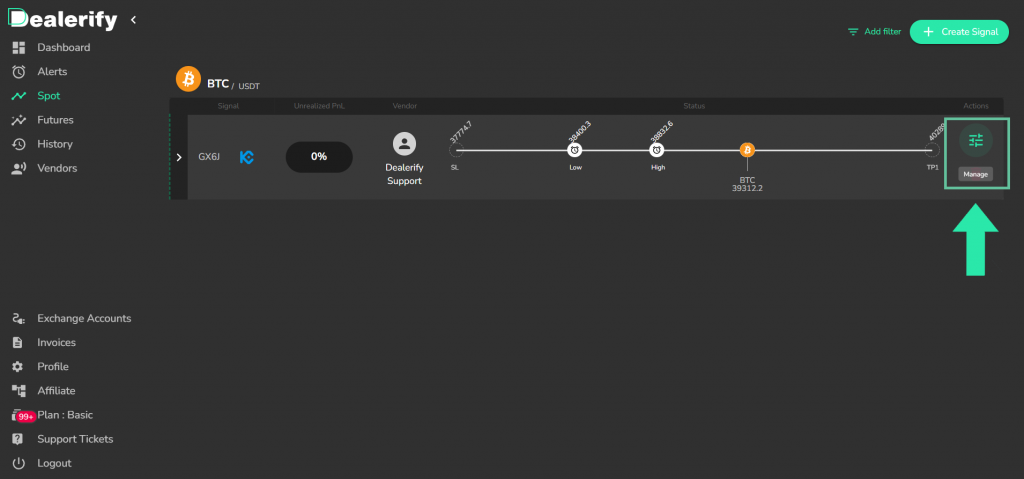
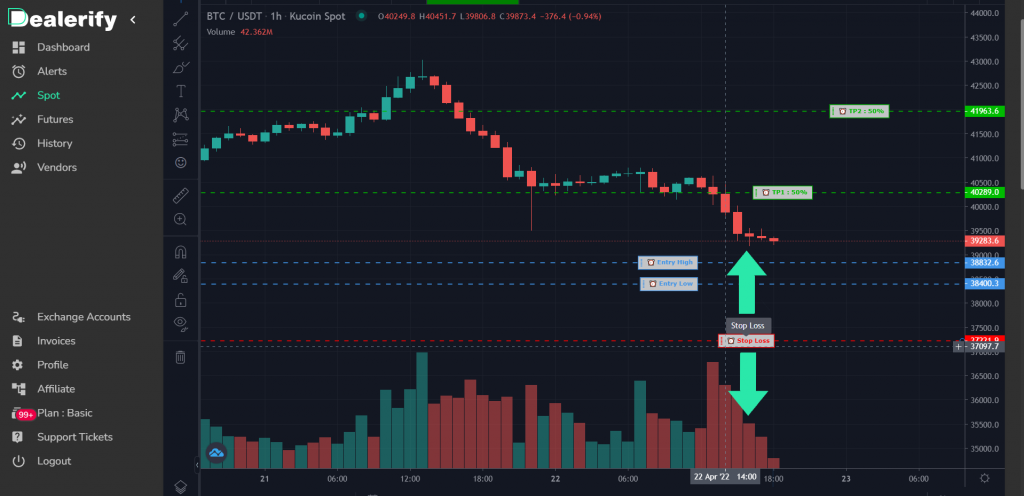
- Go to “Manage” section
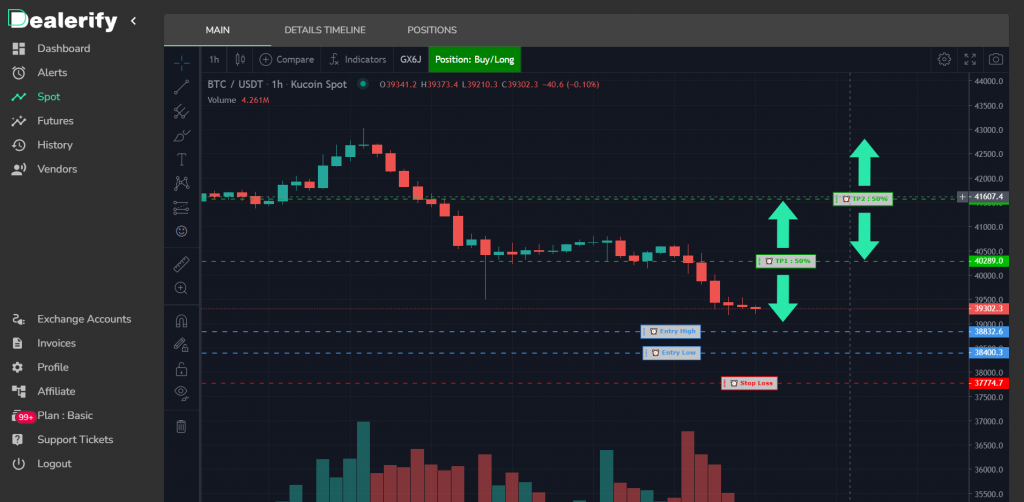
2. Change TP lines on your chart by scrolling up/down them.
3. Or scroll down and find “Target Points” section.
4. Change each TP you want by scrolling right/left them.
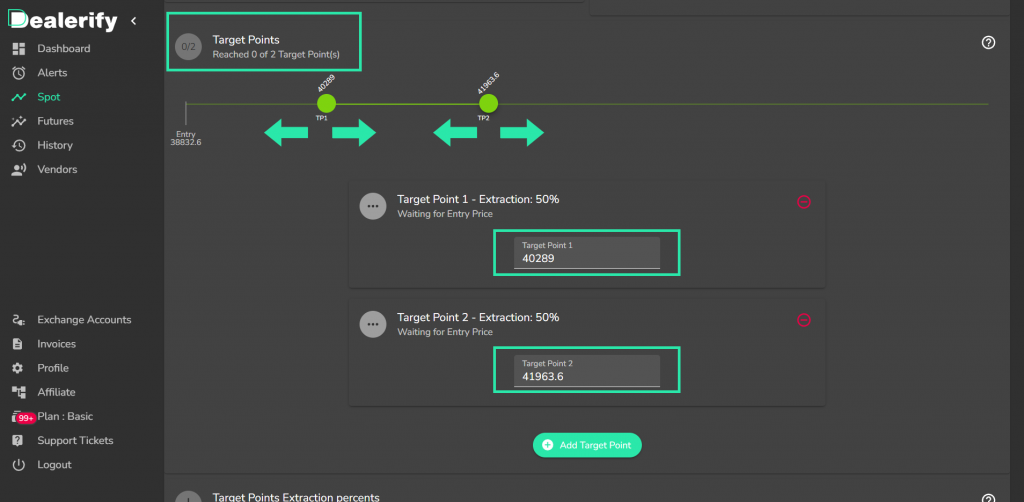
Notice that you can only change which TPs that didn’t get reached.
- Change “Stop Loss”:
- Go to “Manage” section
- Change Stop Loss line on your chart by scrolling up/down them.
3. Or change it on Stop Loss section under chart.
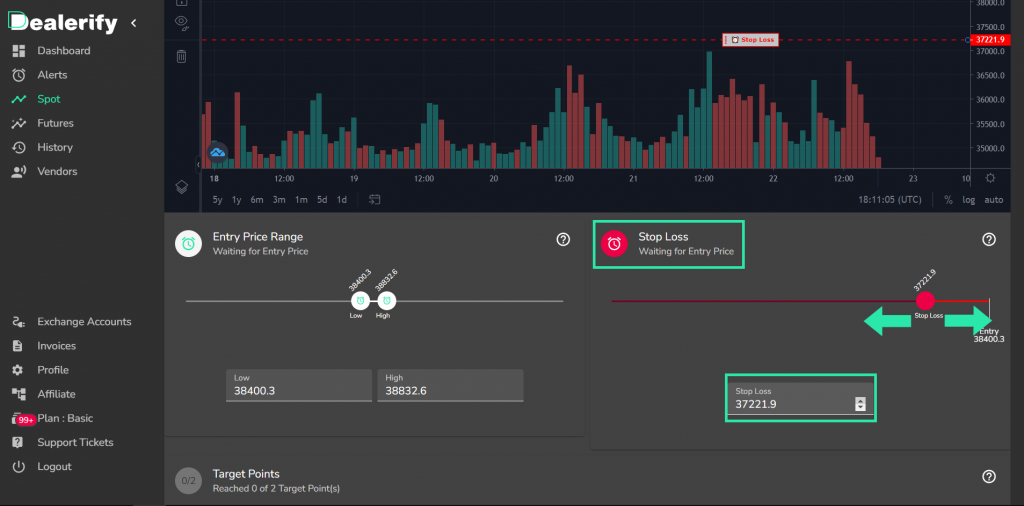
Notice that you can only change Stop Loss top of Liquidation line.
- Add more “Target Points” :
- Go to “Manage” section
- Scroll down and find “Target Points” section
- Click on “Add target point”.

You can add how many TP you wanted.
- Remove “Target Point/s”:
- Go to “Manage” section
- Scroll down and find “Target Points” section
- Click on remove symbol on the right of each TP you want to remove
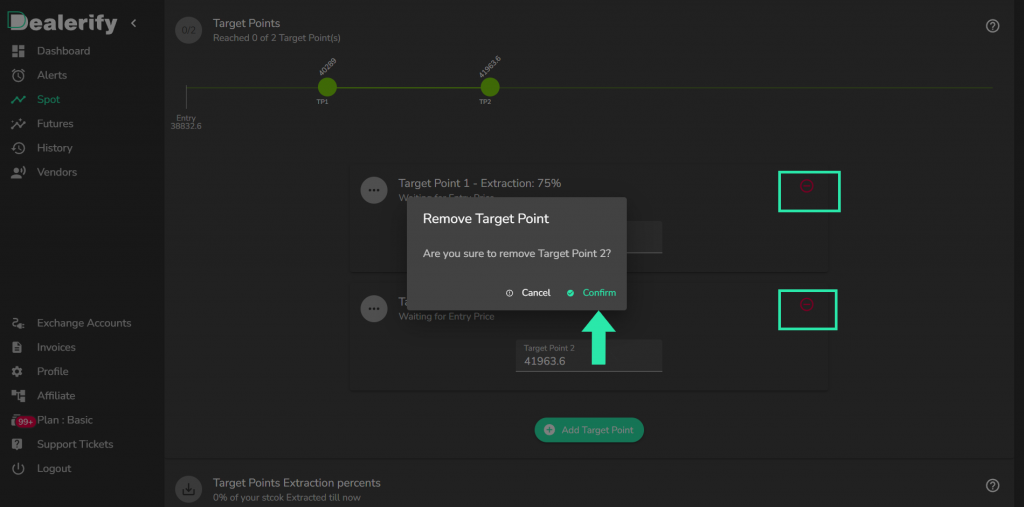
You can remove each TP you wanted.
- Change “Target Points Extraction percent”:
- Go to “Manage” section
- Scroll down and find “Target Points Extraction percent” section
- Change the percent extraction of each TP by scrolling that tp to left/right.

You can change each TP extraction here.